2.6: Interviews

Ten Tips to Produce More Professional Online Video Interviews, by Jeff Hino
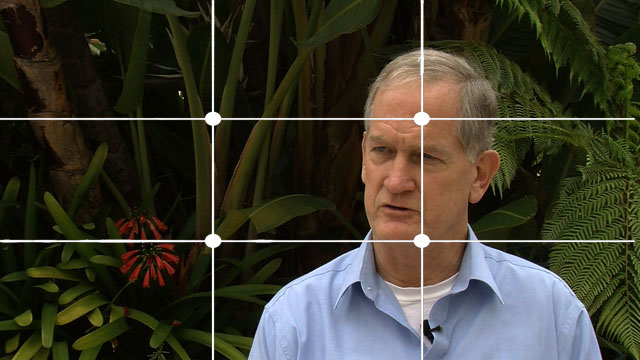
A great way to improve your videos is to interview subjects.Interviews can provide good insights through the actual words of the people involved. When doing an interview, frame the shot with the head and upper chest showing and with the subject off-center to one side or the other.
- As the interviewer, you do not need to be in the shot, but rather stand next to the camera. Stand on the side of the camera that will be the open side of the shot, and have the interviewee face you.
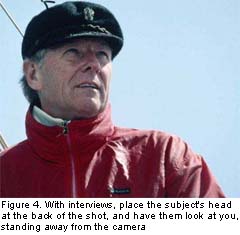
- Tell the person you are interviewing NOT to look at the camera, but just carry on a normal conversation with you and keep eye contact. This may seem awkward but it works really well and it is how almost all professional interviews are done (see image below). This way, you can also be holding a script board, to keep them on message, and they can read it while they talk.
- Remember to leave plenty of space in the shot to allow for the interviewee to move naturally and nod. This way they won't slip out of the shot.
- Subjects should not wear sunglasses! If it's sunny, refer to the Lighting tips on positioning the camera and subject properly.
- Start recording the interview by having your interviewee state their name, and spell it. Also tell us their job title and institution/company etc. This helps immensely when editing to add the name font accurately and easily.
- Set levels and confirm you are getting audio. For those without headphones, its' a good idea to play a short burst back through the camera to be sure they are getting audio. This is particularly important when you are using an external mic, where connections (or wireless transmitters/receivers) may not be operating correctly, or plugs aren't all the way in.
- Best to monitor through headphones to confirm you are getting audio. Nothing worse than coming home with a silent movie interview.
- Have interviewee speak off-axis to you as you stand adjacent to the camera. Don't have them speak directly into the lens.
- Brief the interviewee first, before starting the interview. Let them know that if they make a mistake you can always stop and start again (with a pause between.)
- Tell them that a "long answer is not necessarily a good answer."

Video Class
- Start
- 1.0: Lesson 1 Presentation
- 1.1: So You Want to Make a Video?
- 1.2: When Should You Use Video?
- 1.3: Learning Objectives, Audience and Video Length
- 1.4: What Type of Video Will You Make?
- 1.5: What is a Storyboard?
- 1.6: Why Make a Storyboard?
- 1.7: The Script: Writing for the Ear
- 1.8: Storyboard Templates
- 1.9: Storyboard Components
- 2.0: Lesson 2 Presentation
- 2.1: The Camera
- 2.2: Audio
- 2.3: Tripods & Movement in Video
- 2.4: Composition
- 2.5: Lighting
- 2.6: Interviews
- 2.7: Background Video and Still Shots
- 2.8: 27 Ways To Improve Your Online Video
- 2.9: Checklist - What to Take to the Field
- 3.0: Lesson 3 Presentation
- 3.1: Importance of a Production Plan
- 3.2: Don't Forget these Tips
- 3.3: Production Plan Example
- 3.4: Production Plan Components
- 3.5: Before You Begin Shooting
